To screen record on a Mac, you have several options available. Let’s explore two built-in methods: using QuickTime Player and utilizing the screenshot toolbar.
Method 1 to Screen Record on Mac: Using QuickTime Player
Open QuickTime Player: Launch the QuickTime Player application from your Applications folder or by searching for it in Spotlight.
Access Screen Recording: Once QuickTime Player is open, go to the menu bar at the top of the screen and click on “File.” In the drop-down menu, select “New Screen Recording.”
Customize Recording Options: A small recording window will appear on your screen. Before you start recording, you have the option to customize some settings. To access these options, click on the small arrow next to the record button. You can choose to record your entire screen or select a specific portion by clicking and dragging over the area you want to record.
Start Recording: After selecting your preferred recording options, click on the red “Record” button to start recording your screen.
Finish and Save: To stop the recording, either click on the “Stop” button in the menu bar at the top of the screen or use the keyboard shortcut Command + Control + Esc. Once you stop the recording, you can review it and save it to your desired location on your Mac.
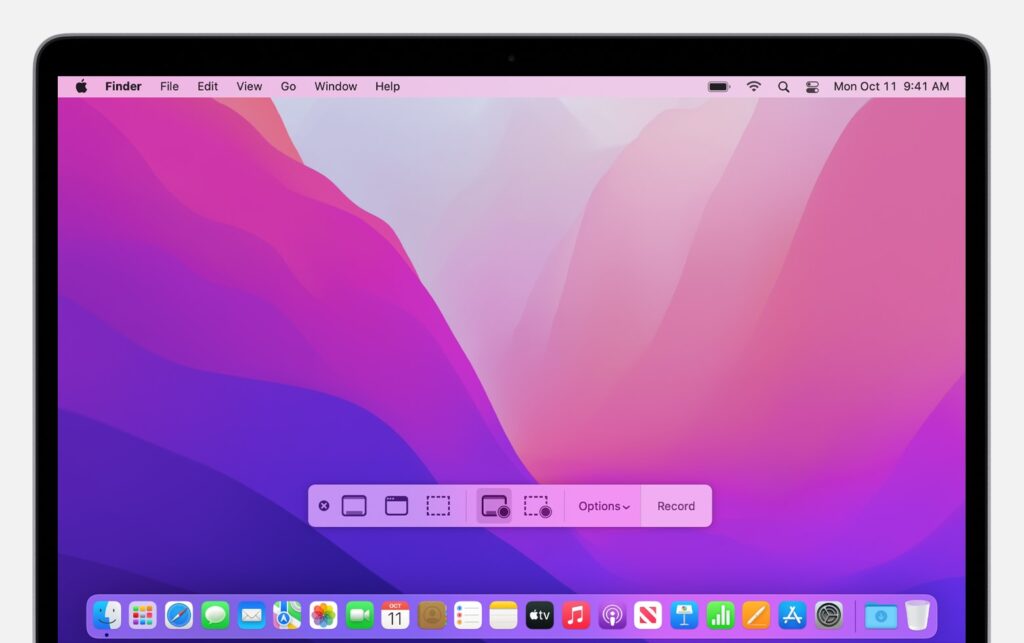
Method 2 to Screen Record on Mac: Utilizing the Screenshot Toolbar
Access the Screenshot Toolbar: Press Shift + Command + 5 on your keyboard to open the screenshot toolbar.
Choose Recording Options: The screenshot toolbar will appear at the bottom of the screen, providing various options for capturing screenshots and recording your screen. To initiate a screen recording, click on the “Record Entire Screen” or “Record Selected Portion” button, depending on your preference.
Start and Stop Recording: Once you’ve selected your recording option, a recording control bar will appear. Click on the “Record” button to start recording. You can also choose to record audio by clicking on the small dropdown arrow next to the record button and selecting the desired audio source. To stop the recording, click on the stop button in the menu bar or use the keyboard shortcut Command + Control + Esc.
Save the Recording: After you stop the recording, a thumbnail of the recording will appear briefly in the bottom-right corner of your screen. Click on the thumbnail to access the recording. From there, you can trim the recording, add annotations, or share it. To save the recording, click on the “Save” button in the toolbar or drag the thumbnail to a desired location on your Mac.
Remember to follow any applicable copyright laws and respect the privacy of others when screen recording.
That’s it! You’ve successfully learned how to screen record on a Mac using QuickTime Player and the screenshot toolbar. Choose the method that suits your preferences and needs. Happy recording!